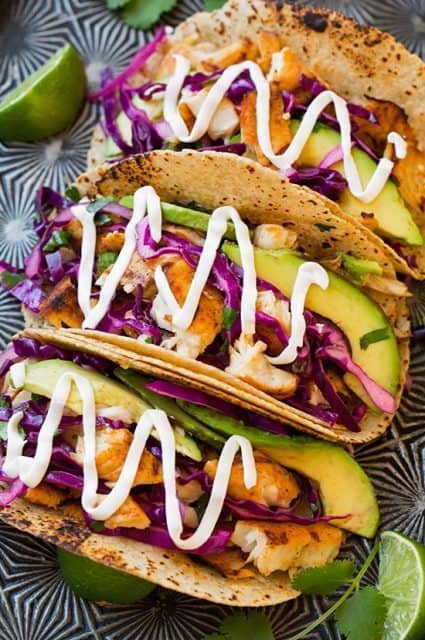
Our recipe of the week is Grilled Fish Tacos. These fish tacos are easy to make and they have a great flavor. When you finish them off with fresh avocado no one will be able to resist!
Fish tacos are deliciously flavorful! These are much healthier than a fried version. And you’ll love that crisp, zesty cabbage topping on these.

[Recipe: Popcorn chicken]
Ingredients
- 1 lb Tilapia , cod or mahi mahi fillets
- 2 Tbsp canola oil
- 1 1/2 Tbsp fresh lime juice
- 1 clove garlic, minced
- Salt
- 1 1/2 tsp chili powder
- 1/2 tsp ground cumin
- Pepper
- 1/2 tsp ground paprika
- 1/8 tsp cayenne pepper (optional)
- 6 corn or flour tortillas
- 1 large avocado, sliced
Sour cream, cotija cheese, hot sauce or salsa, for serving (optional)
Cabbage Slaw
- 1/2 small red cabbage, cored and sliced thin (8 oz)
- 1/4 cup cilantro, chopped
- 3/4 cup thinly sliced red onion (run under cool water and drain to remove harsh bite. 1/2 small red onion)
- 1 1/2 Tbsp lime juice
- 1 Tbsp canola oil
Instructions
1. In a mixing bowl whisk together canola oil, lime juice, garlic, chili powder, cumin, paprika, cayenne and season with salt and pepper to taste (about 1/2 tsp salt 1/4 tsp pepper).
2. Place fish into a gallon size resealable bag and pour marinade over fish. Seal bag (move bag around to evenly coat fish with marinade) and allow to marinate in mixture 20 minutes (and no longer than 30 minutes).
3. Preheat a grill to medium-high heat.
4. Brush grill grates with oil and place fish on grill.
5. Grill until cooked through, about 3 minutes per side (cook time will vary based on thickness of fish).
6. Transfer to a plate, break into pieces and serve in warmed taco shells with cabbage slaw, avocado slices and other optional toppings.
For the cabbage slaw
1. Add cabbage, red onion and cilantro to a medium mixing bowl.
2. Pour lime juice and canola oil over top and season lightly with salt and pepper, toss to evenly coat.
Enjoy!
Recipe source: Cooking classy